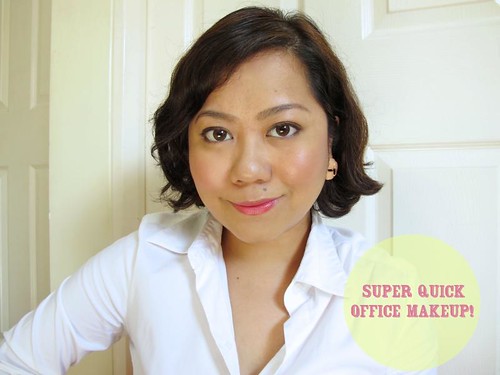
Tutorial: Super quick office makeup
Hi! My name is Mae and i need your advice and expertise badly. I'm 30 years old and a newbie in make up. As in I know no tricks, techniques or best products when it comes to make up. I was content on sponging on a powder foundationand slathering on lip balm since I have suffered from severe chapped lips since forever - thus my aversion to lipstick - and thats about it.
Ironically, I was hit with the desire to put on make up at a time when I could hardly squeeze in some time to learn, research, experiment and practice. You see, I'm a new mother to a 4-month old baby boy, very hands on and breastfeeding at that. To top it off, I have to be at the office by 8am. With the stress of adjusting and lack of sleep I realized I look pale and dry in front of my clients when I caught my reflection on a glass wall. Here I was marketing to them and I looked so unpolished! I felt myself shrink and what a jab to my confidence. That's when it hit me, the importance of make up to [achieve] a polished and professional look. Thus my hunt on beauty blogs and getting to know you beauty experts!

I've been following your blog for some time now since I can go online while breastfeeding but I admit it leaves me quite overwhelmed. Could you please help me? How can I sport an easy and speedy office look? Simple but polished and professional. Think of it as a tutorial for the dummy. What products do you recommend?
Hi Mae, thanks for sending in this letter. I've already done a tutorial on a quick office look with long-wearing makeup (try Bobbi Brown - expensive but the best!), so you can check that for one way to do it. :) I decided to show another routine here with only nine products and 15 minutes of your time every morning!

You will only need one brush and your fingers to do this look. If you use the right products, they'll stay on all day with only minimal retouching. :) Before you do all this though, don't forget to wear sunblock and some eye cream! That will keep your skin protected from the sun and other environmental stressors. Here goes!

Step 1: Use a face primer like the Benefit POREfesshional to smoothen your skin, cover up pores, and help your base makeup stay on longer. A cheaper alternative is the L'Oreal Base Magique - same silicone base and even the texture is similar. :) Apply the primer on your t-zone, where you oil up the most, going outwards.

Step 2: Use a stick concealer like the Revlon PhotoReady Concealer to cover up any blemishes or eyebags. If you want something more long-lasting, you can go for the MAC Studio Sculpt Concealer and just apply it with your fingers. Just pat on the edges of the product to blend out any obvious lines of concealer.

Pat and erase

Step 3: With a big and dense kabuki brush like this angled synthetic beauty from Charm, pick up pressed powder foundation and apply it in thin layers all over your face. I highly recommend using a brush like this to achieve a more natural, less powdery finish versus using a sponge. Oh, and this brush can also apply blushes and bronzers so it's multi-purpose.
I used the Human Nature Perfect Coverage Mineral Foundation in this look. Cheap and good! ;)

Voila, you now have the perfect base makeup that will stay on all day

Step 4: Shade and shape your eyebrows. I recommend a regular visit to brow salons like Browhaus to keep your brows perfectly arched and groomed. :) For quick shading work, something like the Avon Perfect Eyebrow Pencil in Dark Brown can do the job. Cover up gaps in your eyebrows and extend them if you wish (tutorial here) to get even brows. Remove all harsh or too dark lines with the spoolie at the end of Avon pencil.


Step 5: In lieu of eyeshadows that require brushes, you can try a cream eye pencil to define your eyes. I'm using a double-ended pencil, the Shu Uemura Eye Crayon in Misty Brown and Soft Brown, to use as eyeshadow and eyeliner in one. The taupe brown will go on the lids, like so.

You can also use a cream eyeshadow to get the same effect. Again, just use fingers!

The dark brown will serve as eyeliner to make the lash line look thicker and the eyes more awake

Blend the taupe with your fingers to remove any harsh lines

The end result should look like this

Step 6: Every girl needs a brown mascara; it's more subtle than black but still gives the needed definition. Opt for a curling one so that you don't need an eyelash curler anymore! I like the Shiseido Perfect Mascara (using here) and the Shu Uemura Ultimate Natural Mascara in Dark Brown. The best, promise! Cheaper alternatives would be the ones from Avon and Majolica Majorca.
To maximize your mascara, thicken your lash roots by depositing most of the product there. Wiggle upwards to lengthen.

Step 7: Blush will make your skin look brighter and healthier! For the office, a demure rose blush (for morenas) or a peach pink blush (for lighter skin) is just the right color for a fresh flush. Choose a long-wearing blush like the Tarte Amazonian Clay 12-Hour Blush in Blushing Bride so that it will stay put even under extreme humidity and oiliness.
With the same brush above, apply the blush on the apples of your cheeks then sweep it towards your hairline.

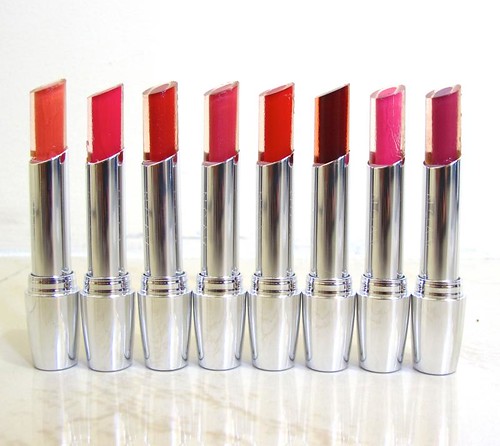
Step 8: Lipsticks may be uncomfortable because they dry up, but to keep the moisture in your lips, all you need to do is apply a generous amount of lip balm and wait for it to absorb. Then, apply your lipstick of choice on top. I used the Avon Shine Attract Lipstick in Mysterious Mauve to match with the mauve-ish berry blush I used. It's also the kind of shade that looks professional and office-safe!


And you're done! This is a quick and foolproof look for all the busy office girls out there. :) If you have more tips, feel free to share them here with Mae!

