Tutorial: Have a fierce Christmas with intense metallic purples
Hi Liz! Where I work, the company Christmas party has always been THE event of the year for us so most of us really go all out on the preparations. I already have a peg for what I'll be wearing that night and I was thinking of using your Irene Adler makeup look (but perhaps with a more neutral lip) to go with it.
Would it be possible for you to make a step-by-step guide on how to do it? Mucho thanks in advance! - Chenyl
Fun fact: Chenyl is one of the first few Project Vanity readers ever. She was there when no one has ever heard of this blog! So when she requests, you can bet I'm on it! It's been a while since I did a step-by-step like this because all told it takes me 5-6 hours to accomplish. But yes, for my favorite readers, the time is very well spent. ;)
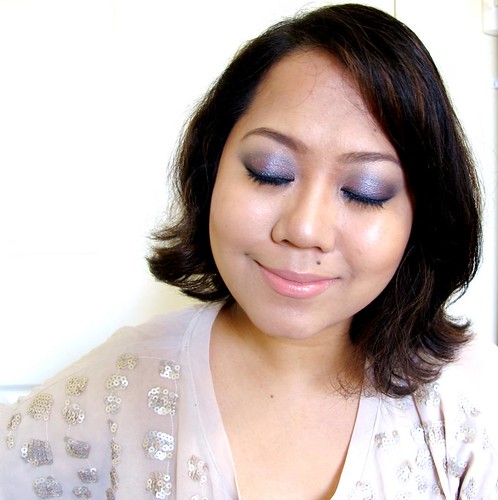
Anyway Chenyl referenced an old look I did. It was a purplish wine smoky eye. I don't have the palette I used there anymore, so I thought I'd show off the new Etude House Mix & Mix Eyes PK001 Christmas Holic palette. It has these gorgeous metallic purples that I think fits the mood of the season! Lots of sparkles, shine, and general extravagance are what Christmas 2012 is about. Gold and red are defaults, but for once let's try out a dramatic purple eye. Here goes!
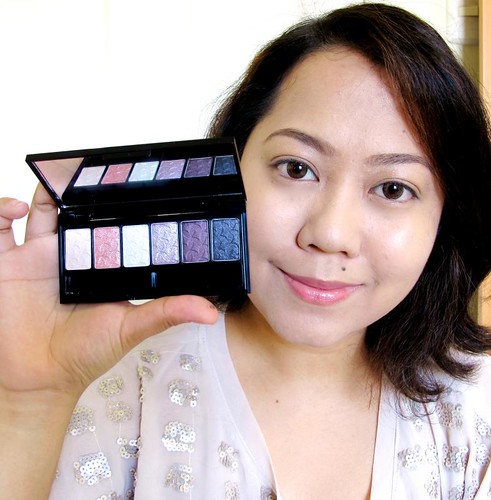
Step 1: Do your foundation (Clinique Pore Refining Solutions Foundation + Clinique Perfectly Real Foundation), eyebrows (Avon Perfect Eyebrow Pencil + MeMeMe Archangel), and then prime your lids with your favorite eyeshadow base (I used the Artdeco Base here).
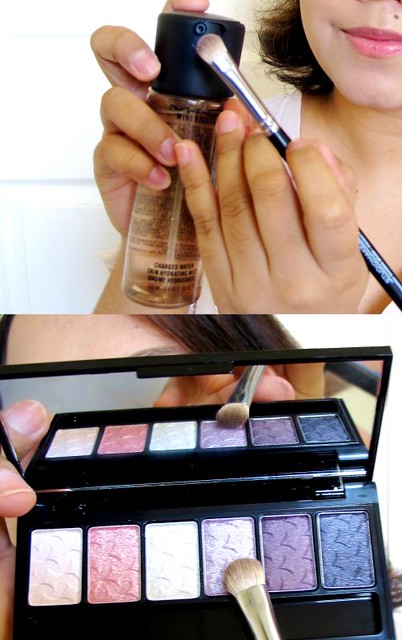
Step 2: Dampen the eyeshadow brush with water. This is a useful trick when you're working with metallic or sparkly eyeshadow as the water makes the color look solid and opaque. Apply the lilac shade on the inner 1/3rd of your lid, like so.
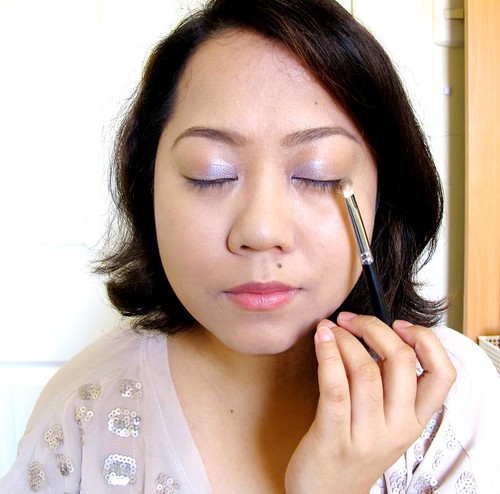
Step 3: Pick up the second darkest purple and apply it over the rest of your lids. You'll blend that later so don't worry if things look too sharp and drawn on.

Step 4: Pick up the darkest shade with a crease brush (domed and small, perfect for detail work like this). Remember to remove most of it on the back of your hand first, to make sure you don't get an overly concentrated line.


Apply the shade on your crease, or socket line. Just draw a neat line as we will blend that out later.


Should look like this!
Step 5: Ready your blending brush - something fluffy and long, yet not overly dense. Blend the lines outward and into each other. Just remember to soften the lines, but not completely erase them.


Step 6: To further clean up the crease line, pick up a matte neutral eyeshadow and apply it on your brow bone. All along you should continue blending out the dark line sidewards and outwards.


See how the lines look so much softer? That's the goal!
Step 7: Outline your eyes with a creamy black eyeliner (used one from Majolica Majorca). I wore a thick line here because I plan to mix it with the dark purple we used earlier, for a more intense and textured look. :) Now I know it looks a bit much, but you will be using this for (what I suppose to be) an evening party! This is the best way to make your eyes stand out. Plus, big drawn on eyes like this look great in photos. ;)


Step 8: Using the sponge applicator that comes with any palette, pick up the darkest purple and apply it on top of the black eyeliner. This accomplishes three things: your eyeliner now looks more fabulous due to the purplish tinge and sparkles, it's guaranteed to not move around since the powder sets the creamy texture, and your whole eyeshadow work looks more blended and smooth due to the monochromatic blending. :)

Step 9: This is optional. If you make a mistake with your line or if you just want to make it look sharper, clean it up with a flat brush loaded with a bit of foundation. Just sweep the edges sidewards to get the shape you're looking for.


Step 10: Contour! This looks great in photos. :) I'm using a Real Techniques brush and MAC Harmony to achieve more defined cheekbones and jawline. Just sweep the color on the hollows of your cheeks and blend it up towards your hair line.

Contour your nose using the same shade. Just follow the line, like so, and blend until you don't see any obvious line.
Step 11: Curl your lashes and apply mascara (Fairydrops Volume Burst, Majolica Majorca Lash King, or Max Factor False Lash Effect). You can opt to wear falsies but IMHO, some mascaras are so good they already look like false lashes. Recos above!


Secret tip: to make the lids look more dimensional, pick up the sparkly white eyeshadow in the palette with your finger. Then, apply it right in the middle of your lids. Pat pat pat! You'll get this nice wet effect!
And here's how it should look like. You can stick with a neutral MLBB lip color like the Etude House Dear My Essence in Lips-talk, which is the color I've been wearing throughout the tutorial. You can go for Anne Curtis nude with the Revlon Colorburst in Soft Nude.

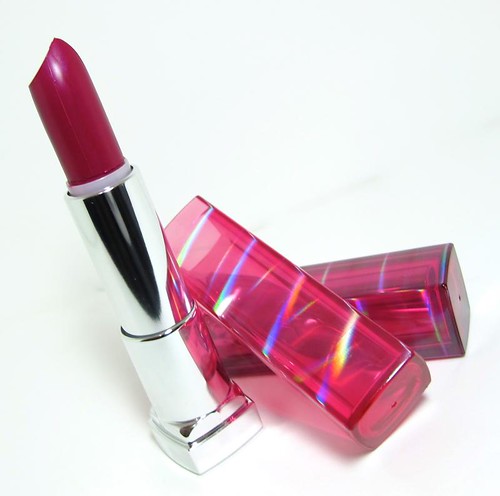
...or go all out with a fuchsia lip like the Maybelline Color Sensational Lipstick in Fuchsia Crystal. I actually prefer this since it really pops in photos. ;)

A sheer red is also a good match (particularly with the dress Chenyl is planning to wear). I say, just wear a color you feel like since the intense purple look is fairly easy to pair up with. :)

Red lipstick training wheels: Tony Moly Kiss Lover Lipstick in RD03
Hope this helps, Chenyl!
