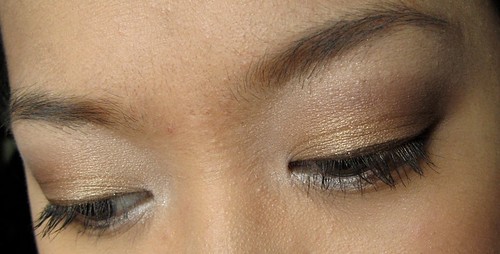
How to Create Double Eyelids with Makeup
Hi everyone! Please welcome Dionne Co, our guest blogger for the day. She blogs at Hello Beauty, so please do visit her and say hello! She's a true-blue makeup addict if I ever saw one. You'll love her tips, I'm sure.
Back in my high school, almost 99% of the students were Chinese. A lot of my classmates complained about not having double eyelids (we used to call it “ting sun” or “fold”) so you’d see some teenage girls walking around with scotch tape on their lids! It was pretty funny to look at but wishing for double lids was, is, and always will be a common occurrence among Oriental girls.
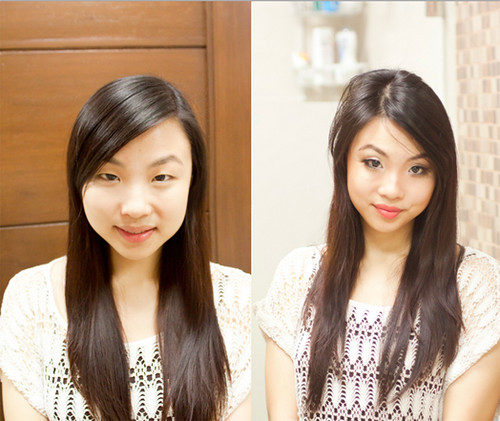
Although I don’t really have anything against surgery, it’s still pretty painful, expensive and risky. Not everyone’s willing to go under the knife. Today, I’m going to show you how to create that double lid effect with something inexpensive, safe and accessible – makeup!
The trick here is depth and dimension.
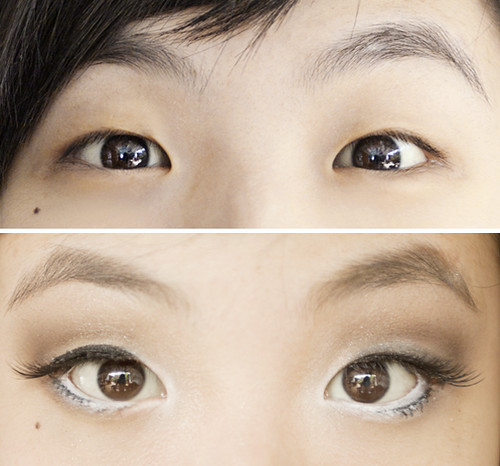
Read the complete step-by-step tutorial on how to create a double eyelid look after the jump!
How to zap eyebags to hell: Skincare recos and concealing techniques
Many factors cause eye bags. For some it is just plain aging and genetics, in which cases it will be improbable to remove the eye bags short of surgery. For others, it's a stressed and unhealthy lifestyle. Eyebags caused by lifestyle factors can at least have hope in being corrected!
Now, the best beauty "secret" is a healthy lifestyle - there's really no going around it. So if you look haggard beyond your time, perhaps it would be wise to cut down on drinking, smoking, salty and fatty food, and maybe throw in a bit of exercise once or twice a week. And please, sleep!
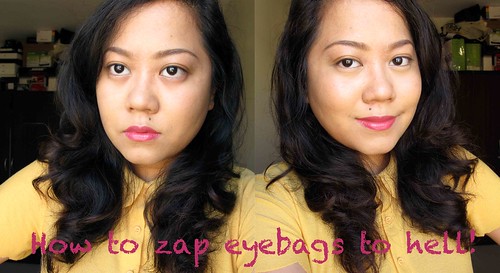
So! With that out of the way, I'll be sharing some beauty products and concealing techniques you can use in hiding your eye bags. I don't have particularly dark eye bags, but my under eyes look puffy and shadowy because of their bulging shape. Yes, that's just how it is.
And here, my friends, are the things I do to lessen the appearance of my eye bags!
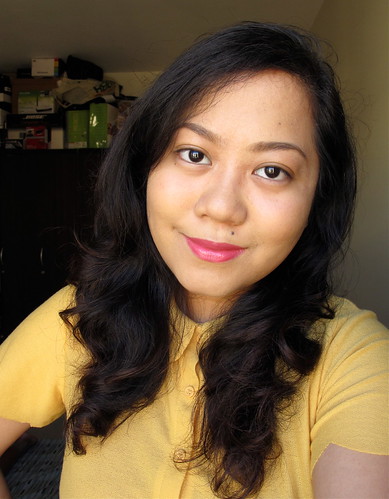
Before
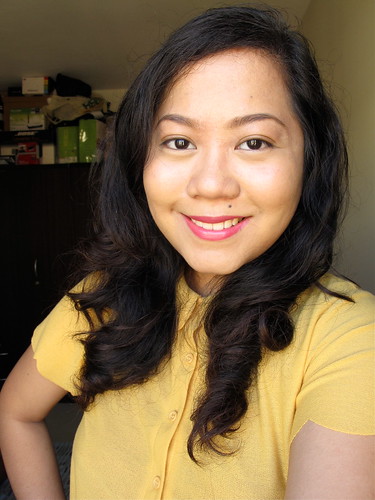
After!
Skincare
Never rub. Ever. Don't rub or touch your eye area because the skin around it can easily be pulled out of place. Resist the urge and keep your hands away from your eyes or else you can develop fine lines before their time.
Beauty tips for Valentine's Day
Valentine's Day is a day away and I'm sure a lot of you are wondering (well I at least I am)...why should you care? Excellent question. It pressures couples into making grand gestures of love on a pre-determined day, and singles just get to feel like crap. I love love. I am in a five-year old relationship. But I dread scheduled stresss.

Be that as it may, Valentine's Day has its uses. It's another excuse to dress up and go have a fun date with your special other or friends, even. So, I thought I'd do a post on beauty tips to keep in mind for the day of love! Take note that they are specifically for a romantic date with smooshing and what else in mind. ;) Consider these as reminders.
Prep time
1. Wax. Depilate. Shave. Say adios to the mustachio and the leg fluff. You want to be smooth and silky all over! I know it's so much work and you think he won't notice anyway but honey, he will. I like using Veet wax strips and depilator creams.

How to use lipstick as a blush
Okay so you packed your makeup kit with the utmost care because you want to look your best in a meeting or an out-of-town wedding. But alas! You forgot your blush! You brought three lip balms, gazillions of brushes and all manner of eyeshadows, but you didn't bring something as basic as a blush. What do you do?
a. Fall into pieces and cry like a little girl.
b. Run to the nearest mall or drugstore and buy a blush. Being late be damned.
c. Borrow a blush from an acquaintance/ semi-stranger and revel in what might be a bacteria-infested party on the compact.
d. Use your lipstick as a blush!
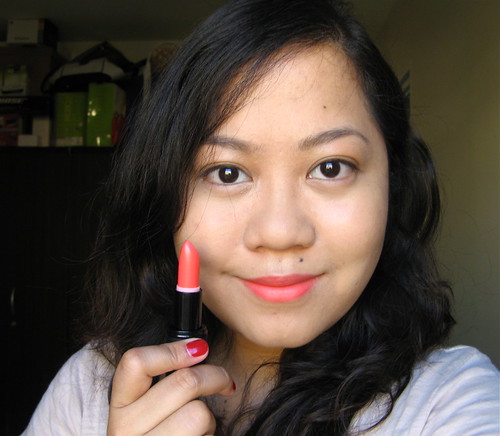
Kidding, just kidding. The best answer is D. You can actually use your lipstick as a blush, provided that it's matte or satin, that is.
How to apply eyeliner like a boss (plus a stub on drawing a mean cat eye)
Whoever invented eyeliner has bestowed womankind a great gift. From the ancient Egyptians, to its rise in the 1920s flapper era, to today's modern woman, eyeliner has served us remarkably well by opening and enhancing our eyes. A simple black line can do wonders for our face - provided it's applied correctly, of course.
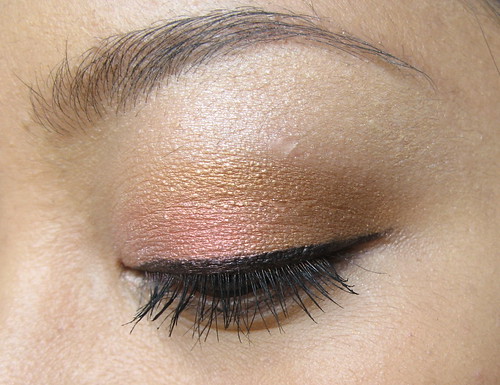
Eyeliner can be difficult to use in the beginning, but trust me, practice is the best way to get your perfect line. Why when I started using it in my teens, I was such a klutz! I couldn't get an even line for all I was worth. I just kept repeating and repeating though until my wobbly line became straight and fine.

Tools: Charm Vegan Pointed Eyeliner Brush and Kanebo Kate Gel Eyeliner
Now, there's no one true way to apply eyeliner. The techniques I'll be sharing here is what I prefer to do with my own eyes, so feel free to experiment and find a method that works best for you. I used a gel eyeliner and a pencil brush for this tutorial but the principle is still the same for pencil, powder, and liquid liners.
Ready? Here goes!
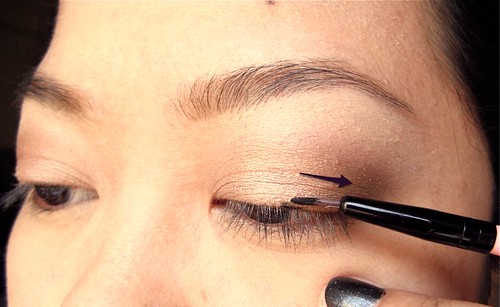
Step 1: Start in the middle of your lash line, then draw outwards.
Charm Travel Pro V3 brush set: My review and how to use it
I'm sure that you've already seen the blogger raves for the Charm Travel Pro brush set. All I can add to the conversation is that yes, this is a great set that you really won't regret buying. It's expensive at P2,200 for the whole set, but then again it's an investment that you'll probably use until you're sick of it. ;)
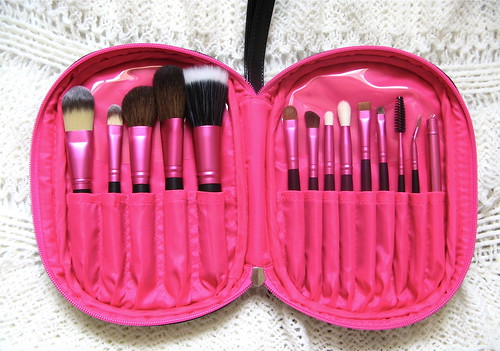
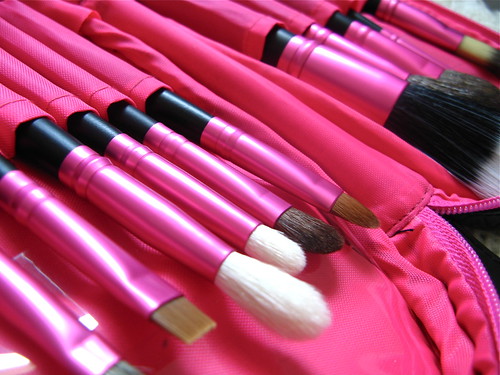
What I like most about this set, aside from the portability, is how useful ALL the brushes are. Some brands throw in brushes just to pad the set and make you pay more for them, but in the end you just use five out of say, ten brushes. That's a waste of money. But this Charm set has a well thought out selection with no repetitive or ineffective brushes in it.
Now, like the Version 2 set, this set is not exactly for makeup beginners since the brushes are designed for precision application. But I hope that with this post, you'll learn how to maximize this set whether you're a beginner or an advanced makeup enthusiast!
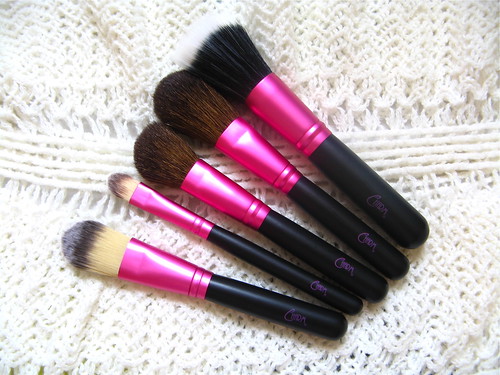
Face brushes
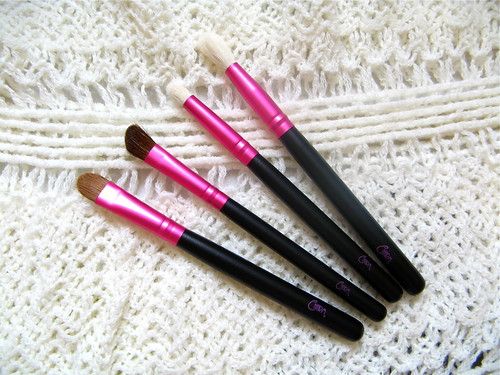
Eye brushes
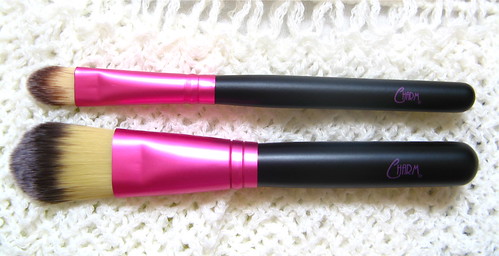
The Concealer Brush (top) is perfect for hiding spots, eye bags, and uneven discolorations in your skin. It's best used with cream or liquid concealer.
Makeup shortcuts and tricks
I've applied makeup on myself more times than I'd care to count. I've discovered a few shortcuts and tricks in the process because I have to streamline, to cut down the time it takes for me to put on all that junk on my face. Some of these I learned from other makeup mavens. So here are "secret" and not-so-secret shortcuts!

- On making the nose look more high-bridged: swipe a concealer across the bridge of your nose starting from between your temples to the tip. Use your forefinger. Make sure the concealer is just one shade lighter than your skintone (the usual). You don't have to use contouring powder and brushes to shape your nose!
- Speeding up concealer application: use your finger. Brushes sometimes deliver lighter coverage, less than what your concealer can actually do.
Tutorial: MAC Wonder Woman look
A lot of girls loved the colorful MAC Peacocky look I posted a couple of weeks back. Are you ready for the next round? :D This time, Mikee will be showing off MAC's Wonder Woman collection. It will be launching on March 19 (Saturday) here in Manila!

Launch dates at the bottom. Open image to view full-sized.
The MAC Wonder Woman collection comes in super-sized, toy-like packaging that sports the heroic femme fatale's signature colors. Notable products are the dual-color Mineralized SkinFinish powders (P2,125), Eye Quads (P2,500), and the colored Opulash mascaras (P900).
Excited to see the look Mikee came up with? Here goes!

Before photo: Say hi to Janelle, our model!

After

Mikee priming the canvas (Lip Conditioner + Fast Response Eye Cream + Prep+Prime Skin). She used the Studio Fix Fluid foundation to even out the skintone, set it with loose powder, then dusted a bit of MSF for a natural glow.
Tutorial: MAC Peacocky look
Peacocky is the latest MAC collection to hit Philippine shores. It's inspired by the gorgeous and fierce colors of one of nature's most magnificent birds. Aside from the unique color story, what's different about this collection is the release of the Mega Metal Eyeshadows (P1,175), a step up the usual MAC eyeshadows when it comes to pigmentation, texture, and even the size of the pan (they're larger). Another new release is the Kissable Lipcolor (P1,150), a gloss-cum-lipstick that will impress you with the pigmentation! It's as good as liquid lipstick and comes in bigger tubes.
I asked MAC if they can demonstrate how to do a Peacocky look, so here's what makeup artist Mikee Raymundo came up with! This look is perfect for evenings out with your friends or when you're going to a special event with a compulsion to wow. Here's a step-by-step photo coverage of the look.

Before: Say hi to Angela!

After
Quick tips on red lips (and products to try)
Are you considering red lips for Valentine's Day (or any day)? A lot of women are a little scared of this color because it's loud AND fussy, but I think it's in keeping with the occasion's theme. A bit of fuss during the first application, when done right, is worth it since you probably don't have to apply it again during the day.
Here are some quick tips as well as some lipstick suggestions:
- Prime your lips with balm. Don't slather on too much. A very thin layer is enough to moisturize; too much and your lipstick will just stay on top and slide off.
- Apply a red lip liner just a little bit inside your natural lip line. Red can be an overwhelming color and you don't want your mouth to look like one huge stoplight! Thin but juicy red lips are more sophisticated compared to thick red ones.

Lined

Shaded with lip liner
FOTD: Easy Valentine's Day look
Here I am again with my Valentine's Day makeup suggestion! I feel that this look is flirty and light, just the thing to NOT scare off your date on Valentine's. I know we girls love smoky eyes and red lips, but there are guys who don't appreciate those kinds of looks. No matter. We should wear what we want if it makes us feel good! But for Valentine's day, perhaps it's better to tone it down a little in consideration of our dates.

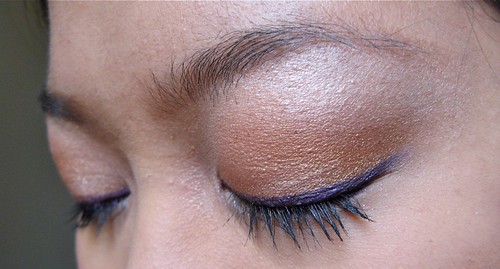
So, I made a tutorial for this FOTD!
Step 1: Start with a well-primed and evened-out face. I suggest using a primer to prevent makeup meltdown, something like the L'Oreal Base Magique (face) and the Too Faced Shadow Insurance (eyes). For this look I used the Avon Ideal Shade Foundation + loose powder from the same line. I also used the MAC Studiofinish concealer
Step 2: Apply a champagne eyeshadow like MAC All That Glitters all over your lid.
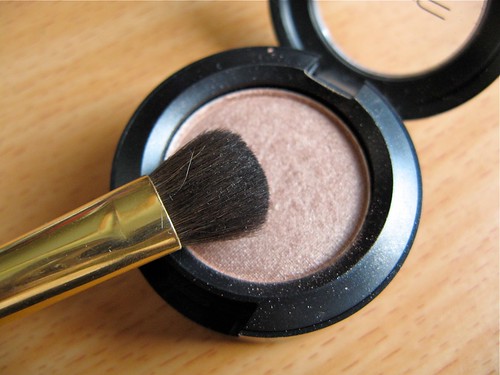
How to depot MAC eyeshadows
I've been looking for a MAC 15-pan magnetic palette (P835) for MONTHS, but finally, MAC Glorietta restocked! I excitedly checked YouTube videos to touch up on my knowledge of depotting, or moving individual eyeshadows, to a magnetic palette. It would be so much easier to have all my eyeshadows in one place, making it more convenient to pick and use colors.
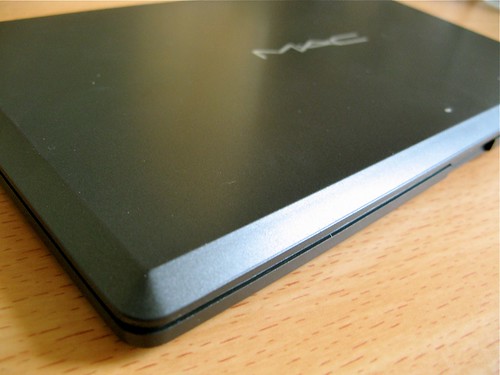
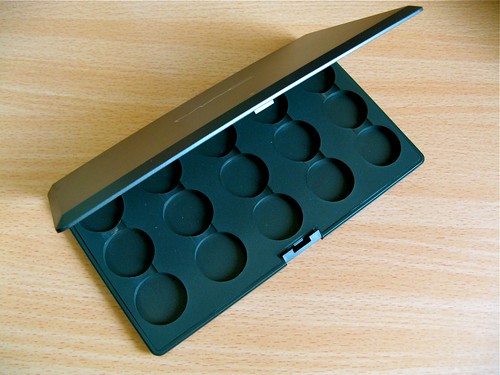
The procedure looked quite simple and quick to do - but I should have known not to judge appearances! It's harder than the YouTube gurus make it seem. However if you're careful, depotting your eyeshadows shouldn't be too much trouble.
Here's what you need:
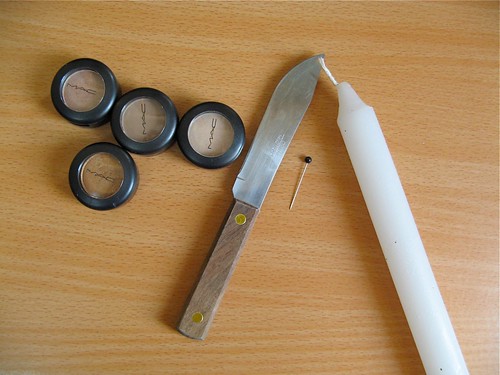
Potted eyeshadows, thin knife (preferably dull), pin, candle
Thong, alcohol, tissue, small flat magnets with adhesive on one side (not in photo)
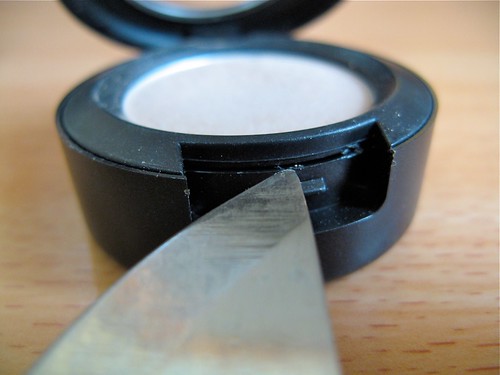
Step 1: Place the tip of the knife in the slot near where the cap locks in. Gently pry the eyeshadow loose. This is what it should look like:
FOTD: Holiday glam
Do you feel Christmas in the air? Me, sort of! The weather is definitely colder (at least during mornings and evenings) and the neighbors are putting up wreaths and trees. Shopping malls are playing Christmas songs on loop, which I think is sneaky since it makes people mellow and make them want to buy more stuff! Anyway, I'm already making plans for the holidays - gifts to give, food to prepare - but I'll never forget the most essential thing...what to wear!
This season means more parties to attend, whether they're with family, friends, or co-workers. Allow me to suggest a look that features two major holiday themes: sparkle and the color red. What I like about it is that it's versatile and has that "wow" factor. If you're not comfortable with a strong red lipstick, you can easily replace it with a toned-down shade.
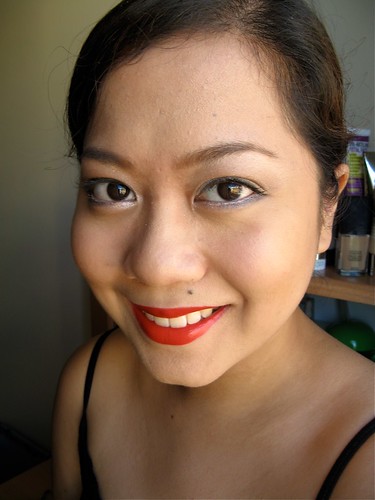
Are you ready for my tutorial? Read on!
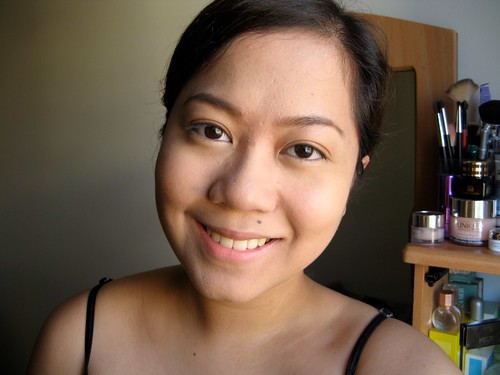
Step 1: Start with a well-primed and evened-out face. Parties tend to last until late, so your makeup should be able to keep up! I used the Smooth-365 Peptide Serum as primer, then applied the Paul & Joe Creamy Compact Powder Foundation, MAC Studiofinish Concealer, topped by Ellana mineral finishing powder. In2It for the brows and Too Faced Shadow Insurance as eye primer.
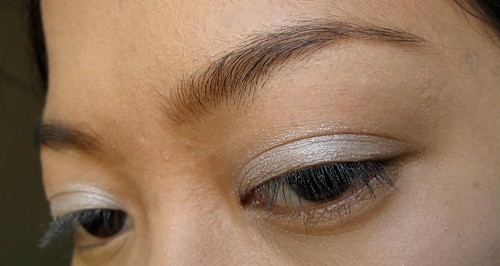
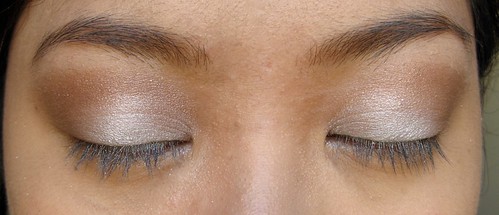
Step 2: I patted on a sparkly white eyeshadow (Urban Decay Polyester Bride) on the lid. It's whiter and more glittery in person! I always thought it's a lot like snow.
Inspired by Karla
Have you guys ever come across a fashion blog called Karla's Closet? It's amazing! I love Karla's sensible, modern style that's far from boring since she always incorporates romance, whimsy, and vintage into her looks. Aside from her fashion sense, I love her makeup! She doesn't wear that much actually. I just like her signature looks: dark blood red lips (which compelled me to get NYX Dark Cherry) and nude lips with barely there eye makeup.
This time, I saw something different on her: pale lips with smoky eyes. Nothing new but I love the whole "thrown-together", effortless feel of the makeup.

I liked it so much that I decided to cop the look. It's super easy! You can do this in less than 10 minutes. You just need two eyeshadow colors; although you can technically do with one (black) I want something a tiny bit more polished.
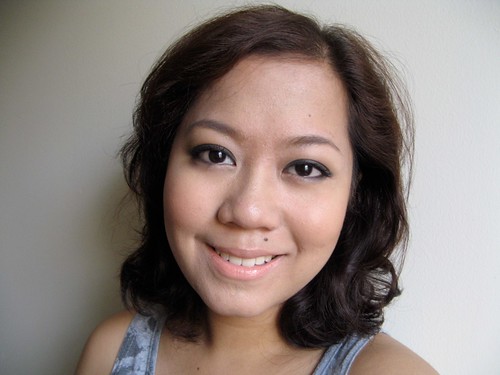
Are you ready? Here's what I did!
Step 1: Do the ground work. Prime your face and brows. For this look, I used: Revlon Beyond Natural concealer, Ellana Caramel Latte mineral foundation and Ellana Espresso Con Panna finishing powder.
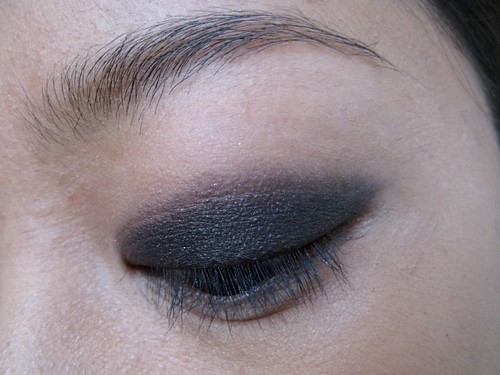
Step 2: Pat on black matte or semi-matte eyeshadow on the lid. I used Urban Decay's Oil Slick eyeshadow.
FOTD: Pink, gold, and daring fuchsia
My go-to lipstick lately is my Revlon Colorburst in Fuchsia. For this look, I challenged myself to come up with an eyeshadow combination that will not clash with the loud lip. I thought of warm colors like gold and pink to flatter my skin tone as well as lend a hand in accentuating the fuchsia!

Photo tutorial up ahead.
Step 1: Pat a warm pink eyeshadow (Urban Decay's Sphynx) all over the lid.


Step 2: Pat on a gold eyeshadow (Twice Baked) on the outer third of your lid.
FOTD: Winged tea
I am in love with Urban Decay's eyeshadow called Shattered. It's an iridescent shade of teal that reflects fine gold shimmers and has a lovely mint green undertone to it. Perfect for summer! It's very tan friendly. I usually wear it with brown but in this look I decided on a smoky moss green called Misdemeanor (also from UD).
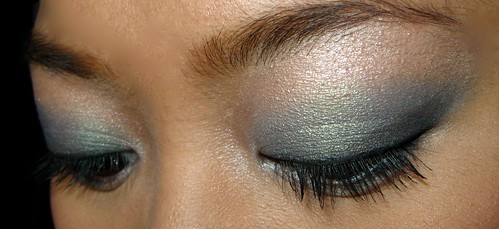
The technique I used in achieving this look is pretty simple! This is what I did:
Step 1: Pat Shattered all over the lid, subtly winging it out.
Step 2: Draw a thick line on the roots of your upper lashes with Misdemeanor. I used a small, round brush to achieve this. Also line your lower lid.
Step 3: Create a thick wing using your eyeshadow, as shown.

FOTD: Foliage, green and brown
I am trying to de-stress a bit on this maddening Monday since I have a ton of things on my plate before I can leave for a well-deserved vacation. I was thinking of lush green trees and shrubbery, hence this look! I made a step-by-step eyeshadow tutorial since this is pretty easy and quick to do. All it takes is three steps and you're out of that door.
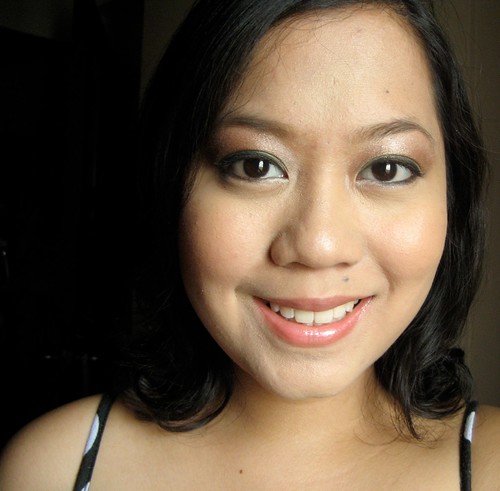
On my face: MAC Studiofinish Concealer, Shiseido Supplist Poreless Foundation, Ellana Espresso Con Panna (finishing powder), Artdeco Brozing Powder, Shu Uemura Glow On in Amber
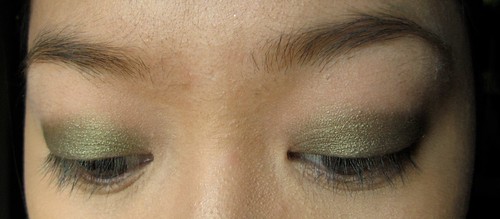
Step 1: Pat green eyeshadow on your lid. I used Mildew by Urban Decay.
Graduation Makeup Tutorial
It's graduation season! Sigh, just thinking about it reminded me of my own graduation last year. It was a solemn event shared with friends and family, who were all so proud of me, and me of them. I've done so many things since then, things I never even once considered while I was studying Political Science at UP Manila. Well! That's another story, haha.
I made a tutorial for all you young graduates out there. Graduation makeup, of course, should fit the occasion - formal, somber, respectable, but not necessarily boring! Hence, I used gold eyeshadow to bring out the eyes while the rest of the colors (different shades of brown) were used to contour the eyes to get a more photogenic effect.

