Reader question: How to achieve dewy, glowing skin
I love the look of fresh, dewy and glowing skin. Can you give me a few products that will help me achieve that? Thank you. - Therese
Hi Therese! I love this question because I love glowy skin as well. I don't understand the obsession with matte skin because our skin is not matte in its natural state. Nothing screams *makeup* than a face that's covered in a blanket of matte powder, for me! Shine is fine as long as you're able to control it and place it strategically on your face.
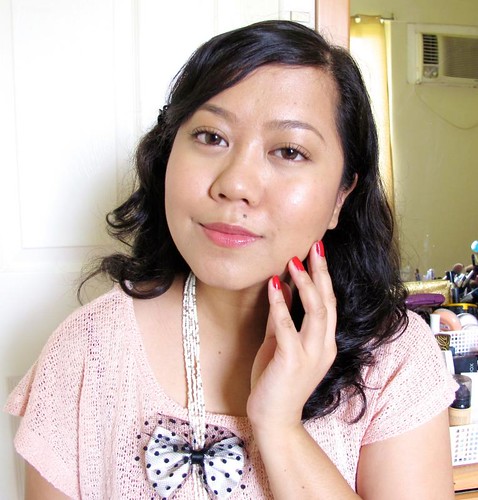
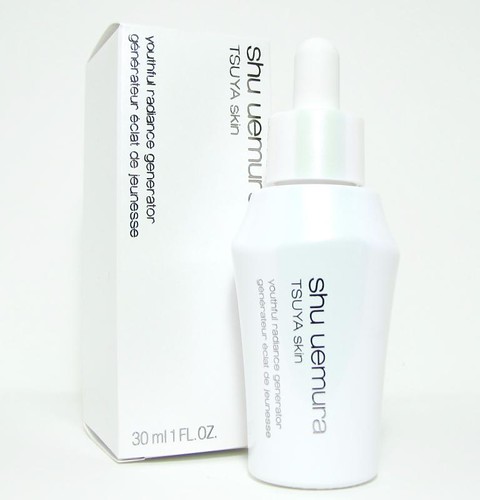
A dewy-looking face starts with good skin, of course, so make sure that your skincare routine is up to spec. I find that using serums make a huuuuge difference - try the Kiehl's Midnight Recovery Concentrate or the Shu Uemura Tsuya Skin Serum (which I am testing recently). These work super well! As for makeup, there are many products that you can use to achieve a glowy face. The trick is to use only one or two of them at any given time, depending on the look you want to achieve.
Face Base: for an all-over glow
A thin, light-coverage foundation can deliver dewy skin simply because it allows our natural skin to shine through. Remember, in order to achieve dewy skin, you must not cover up your bare skin with too much makeup. Light, illuminating makeup will just enhance your skin, not blot it out.
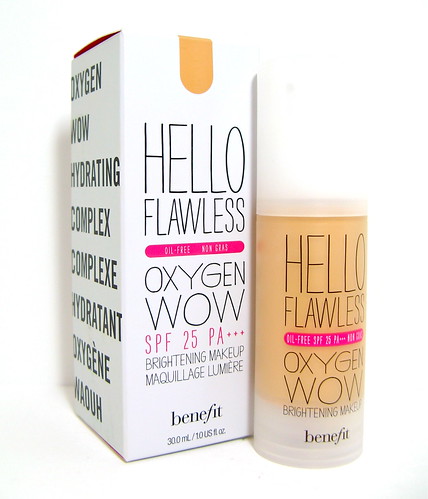
The Benefit Hello Flawless Oxygen Wow Brightening Makeup gives such a nice dewy finish. If you want something with even lighter coverage, try the VMV Hypoallergenics Skintangible SPF30 which is a tinted moisturizer with SPF30.
Tutorial: Bea Alonzo's "The Mistress" makeup
Someone on Ask Liz! requested for a tutorial on Bea Alonzo's makeup on her latest movie,"The Mistress". I thought it was a cool idea! I've been wanting to watch that film ever since I saw the trailer last August. The story seems interesting enough, but I also love how Bea looks so polished and different in it. The makeup she wore really enhanced her beauty which is awe-inspiring considering that it looks like she's not wearing much at all.
I haven't seen the movie yet so I did this tutorial based on the trailer and the pomotional pictures. I would describe Bea's makeup as the Prime Look, which is not the "no makeup makeup" or even the "natural makeup" look. It's done with a heavier hand that focuses on color matching, contouring, and precise eyes to bring out the perfect version of a face (hence "prime").
Don't worry. it's not as complicated as it sounds! I've made a step-by-step tutorial on how to achieve Bea's makeup. Of course I don't look anything like her, but makeup-wise it's fairly near. Let's get crackin'!
Step 1: Bea's skin is super smooth and translucent in the film, so skip the heavy matte foundations and opt for something light instead. I used the Benefit Hello Flawless Oxygen Wow Brightening Makeup. This is a great brightening foundation that looks invisible yet gives good coverage. After concealing, I topped it off with the Palgantong Theatrical Powder to get a smooth and translucent finish.
Get used to wearing loud lipstick in five steps
"I don't have the skin tone for it!", "My lips are too big!", "I'm shy, and "My boyfriend doesn't want me to" are some of the reasons girls are scared of wearing colorful and loud lipstick. Well I don't want to force you if you really can't but if you've always wanted to BUT blah blah blah then girl, maybe you're afraid of something more than just eye-catching lips. Maybe you don't feel too confident about your own beauty, which is why you don't want to draw attention to it.

That's just wild conjecture, of course. I'm just basing it on the comments I've received in all my lipstick posts. :) Anyway, today I'll teach you how to get used to wearing loud lipstick. The trick is in realizing that you're the only one holding yourself back - not your judgmental friends or boyfriend, not your perceived lack of good looks. I think we're all beautiful and a hot pink or red lipstick is just the perfect punctuation mark!
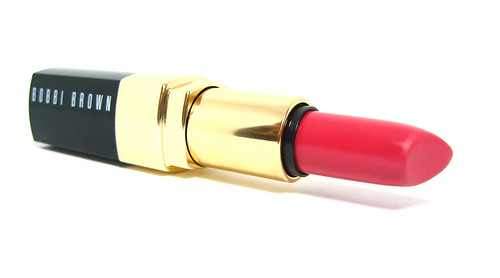
Step 1: Invest in a classic and universal color. MAC has great lipstick shades that have stood the test of time. One is Russian Red, a bold luscious color that flatters any skin tone. If you like pink, Pink Noveau is also a popular choice.

Tutorial: the No Makeup Makeup Look
The "no makeup" makeup is a look that enhances your skin and features in a way so subtle that it's almost invisible. Your skin is just supposed to look healthier and glowing; your eyes, defined but without any obvious lines. This is the look where your natural beauty takes the spotlight - with a little bit of help, of course!

Now there are dozens of ways to do the no makeup makeup. The common denominator is the focus on skin that looks like skin, which means that you should avoid matte face makeup. The goal is to even out the skin and conceal blemishes and dark areas strictly as needed. Brows are also meant to be soft while the lips and cheeks just slightly tinted or colored with an MLBB lipstick.
Wanna see how I do it? Let's get crackin'!
 l
l
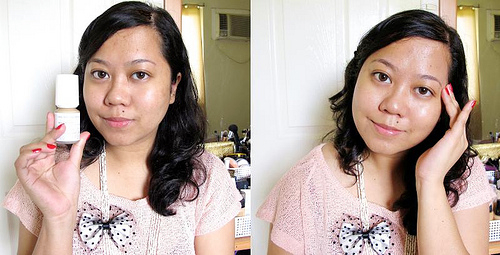
Step 1: Use a brightening tinted moisturizer with a light coverage. I am currently loving the VMV Hypoallergenics Skintangible SPF30. It has barely any coverage but it evens out my skintone wonderfully. It's illuminating, too.
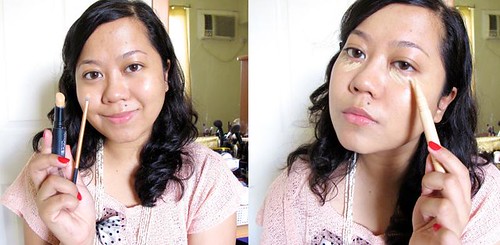
Step 2: Conceal only where needed.
Tutorial: Coffee to cocktails look with Bobbi Brown
Scenario: you're an office girl and you have caffeine-powered meetings all throughout the afternoon. After work, you plan to chill with some friends over cocktails or maybe attend where you need to step up your look. You have your outfit prepared but what about your makeup? It has to be up to the task! What you need are long-wearing products that need only minimal retouching as you transition from day to night. That's where Bobbi Brown comes in.
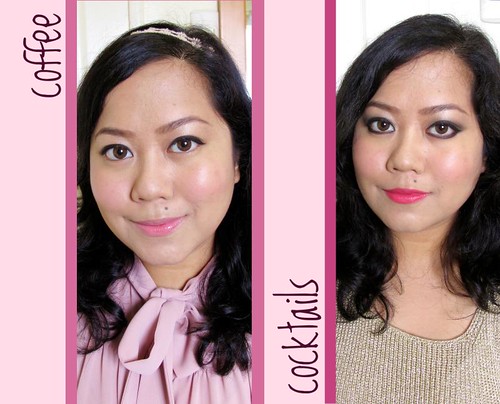
No other brand understands working women better than Bobbi Brown, I think. Her focus has always been on natural-looking, polished makeup that's easy to do AND carry around. The Long Wear Eye Collection is perfect for all you office girls out there, or anyone who wants long-lasting makeup for that matter.
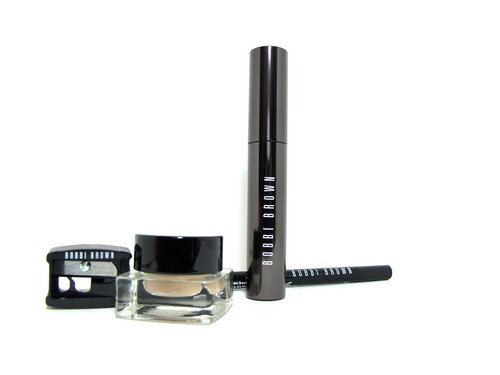
I will review the products separarely next time. :) For now, I want to show you a look I did entirely with Bobbi Brown products I have in my kit. It's what I would wear to the office (clean, natural makeup) straight to cocktails (darker, more intense eyes and lips). Here's a step-by-step tutorial!
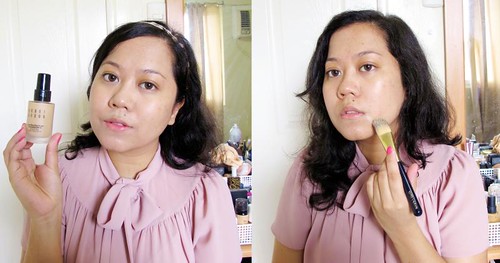
Step 1: Apply a reliable, sweat and oil-resistant foundation such as the Bobbi Brown Long-Wear Even Finish Foundation. This foundation just doesn't quit! It's also heavy coverage so I can use it to conceal most of my blemishes.
Tutorial: Silvery smoky eyes
Hi folks! How are you holding up? The rains have somehow abated (we're on alert level Yellow according to PAG-ASA) so that should be a relief. Should you be interested in donating relief goods to those affected by the flooding, you can find a consolidated list of relief operations here. There may be one in your area.
Back to lighter things! Today I'm going to show you how to do silvery smoky eyes using some Revlon products that have been recently released. It's a light smoky eye so you don't have to worry about it looking garish, but it does give your eyes some definition and mystery. Perfect with LBDs, sequined outfits, and general evening wear! If you're going to a wedding or party, this is a great look to try.

I've already done my face makeup and eyebrows. Ready? Here's how I did my eyes!
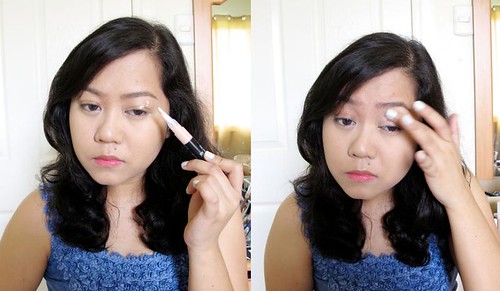
Step 1: With your finger, smooth out an eye primer all over your lids. This will help intensify and extend the wear of your eyeshadow. I used the Revlon PhotoReady Eye Primer + Brightener.
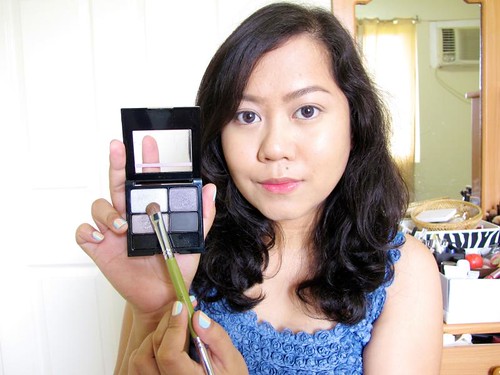
Step 2: Pick a soft silver eyeshadow to use as lid color. I'm using the Revlon ColorStay 16 Hour Eye Shadow Quad in Siren here
How to find the ideal shape of your eyebrows
The truth is that there is no one face that's exactly the same. What about twins? You know what I mean! My point is that in order to find the right hair style, contour, or in this case, eyebrow shape for you, you have to use your own features as your point of reference. From there you can enhance your face in the most natural way possible.
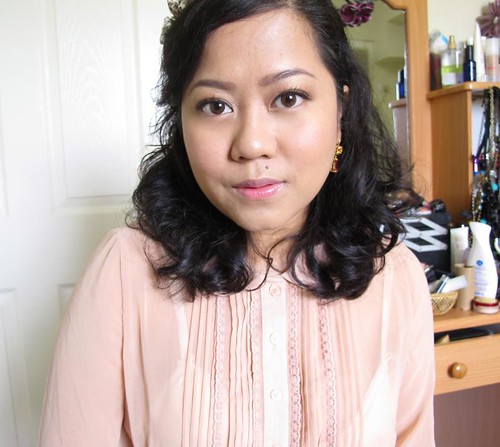
Today I'm going to share a common technique used by pros to find a face's ideal brow shape! You will need any long straight object to measure. For convenience, I used my eyebrow pencil (Avon Perfect Eyebrow Pencil in Dark Brown).
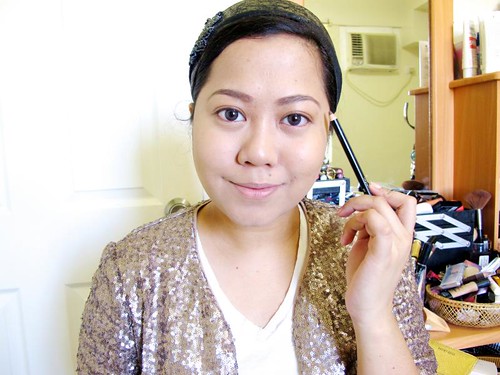
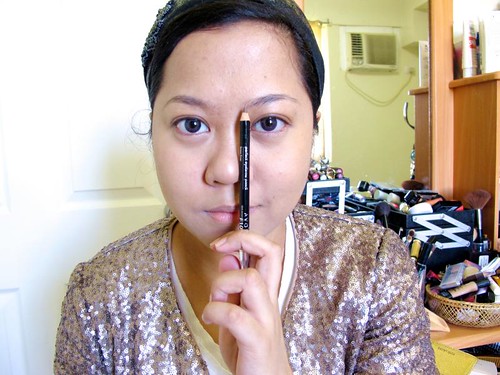
Step 1: Find out where the inner point of your eyebrows should begin. Place the pencil parallel to your nose, poiting upwards. The point where your brow and pencil intersects is your starting point.
Hair tutorial: How to do a bouffant in five minutes
Okay, two things about me: I am inept when it comes to styling my hair and I have very thin hair. That kinda limits the number of options for me, doesn't it? I just usually let my hair down to allow my natural curls to do the work but that can get old pretty fast!
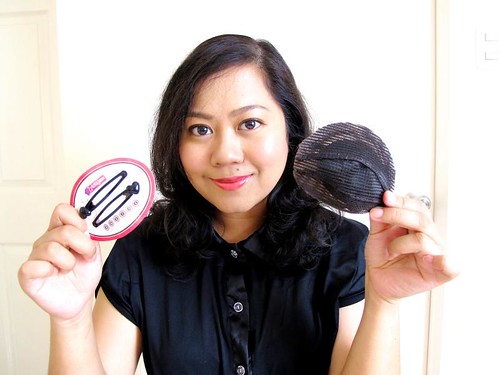
Good thing we live in the future. There are a lot of cool implements and tools to style our hair now, one of which is this Pinkbox Hair Puff. Disclaimer: I work with the brand. Still, I think it's a pretty neat product so I decided to share it with you guys. :)

Basically, the Hair Puff is a velcro insert that you can use to do bouffants on the front or middle part of your head. Instead of teasing your hair and using loads of hair spray to create volume, you can cut the prep time by simply attaching the puff. This is very useful if you want volume on top of your head without the work and the nasty part of cleaning it all up.
So, without further ado, here's a super easy tutorial on how to do a bouffant using the Pinkbox Hair Puff and only two clips!
Awesome DIY ideas!
I love looking at DIY tutorials but I never get around to actually doing them. I'm all fired up today though! Must be the caffeine! I'm hyper inside! Wil be stepping out in a while to buy materials and turn myself into the next DIY Queen. Kidding. Maybe. Don't listen to me!
You need to know this though: there is an awesome craft store that sells stamps, punchers, and other specialty products somewhere in the Greenhills area. Must visit. Read the Quaint Desk for the guide!
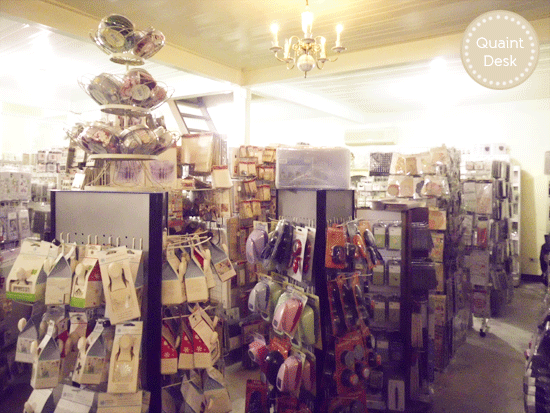
Photo via Quaint Desk
Anyway, here are some cool DIY ideas that I am bookmarking for you (and myself). Tell me, which one is your favorite? :D
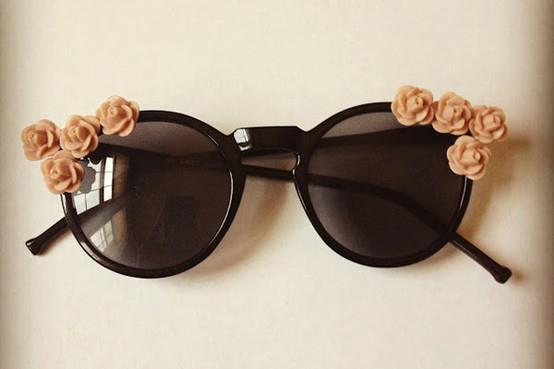
Sunglasses with plaster rosettes ala Dolce & Gabbana

Beauty for newbies: What you need to know about personal makeup
I've been beauty blogging for four years now, and in that time I've answered a lot of questions about makeup - especially ones referring to application. Some questions I've answered waaay back in the past, so I take it for granted that everyone who reads this already knows a thing or two when I review products.
But I still get a lot of inquiries from new readers (welcome, guys!) so I thought I'd compile all the basic tutorials I've done for their benefit.

Beauty Basics: What every girl needs in her makeup kit

How to apply flawless face makeup: learn how to maximize your liquid foundation and concealer to fake perfect skin (this is more for girls who need heavy coverage).
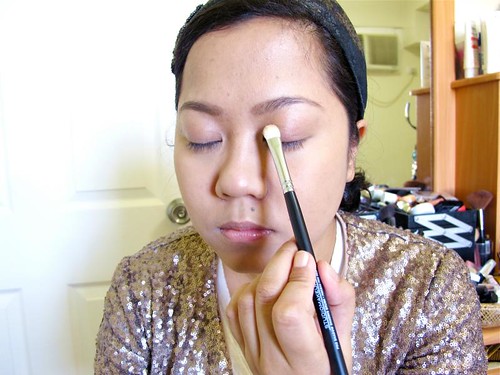
How to apply basic eyeshadows
There are a myriad of techniques and styles when it comes to applying eyeshadows, but I like to keep it simple for an everyday and versatile look. By simple, I mean using only three colors and one brush. Yes, one brush. :) Brushes are fun to use but only for advanced and very detailed eyeshadow work. For a basic day look, one brush and three colors is really all you need!

I love doing colorful eye looks but for this tutorial, I thought I'd show you a universal way to highlight and contour your eyes. Knowing how to do neutral, enhanced eyes is crucial knowledge; with it, you can wear virtually any shade of blush and lipstick. If you have to know only one eyeshadow look, this is it.
Here's the step-by-step tutorial!
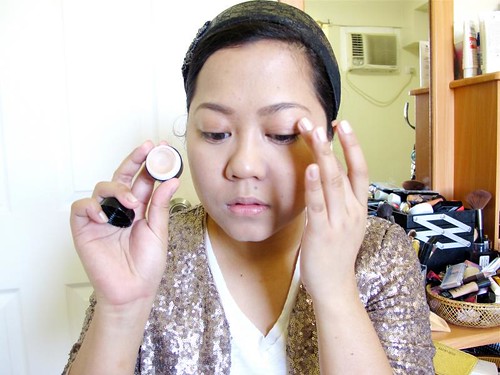
Step 1: Prime your lids with an eyeshadow base. An eyeshadow base is a MUST when wearing eyeshadows because it intensifies their color and extends their lasting power. Pat on a thin layer and wait a few seconds for it to dry. I love the Urban Decay Primer Potion and the ArtDeco Eyeshadow Base.
How to enhance your naturally fair skin (plus get a chance to win a shopping spree from Palmolive!)
Fair-skinned girls are lucky in the sense that they can pull off a wider range of colors. Anything from pastels to jewel tones look good on fair skin! But, the basics first! If you have fair skin, here are a few tips on how to enhance it with makeup.

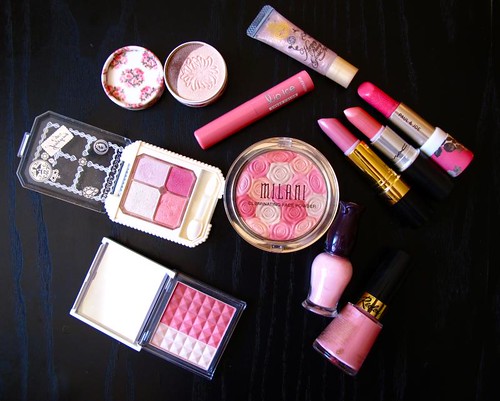
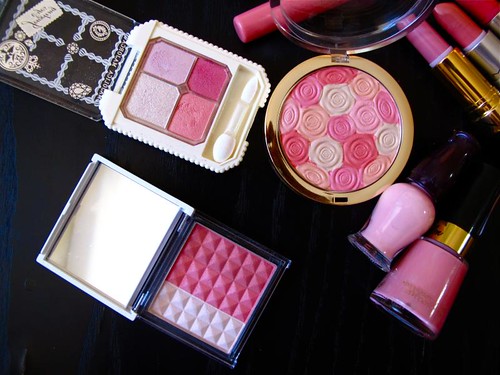
1. Wear pink! Pink is a bright and cheery color that anyone can pull off. If you wear coordinating blush, lips, and nails, the pink will bring out your skin’s cooler (lighter) tones. If you have warm/yellow undertones, go for warm shades like hot pink and fuchsia. If you have cool undertones, go for blue-based and/or pastel pinks.
Review and tutorial: the K-Palette Lasting 2-Way Eyebrow
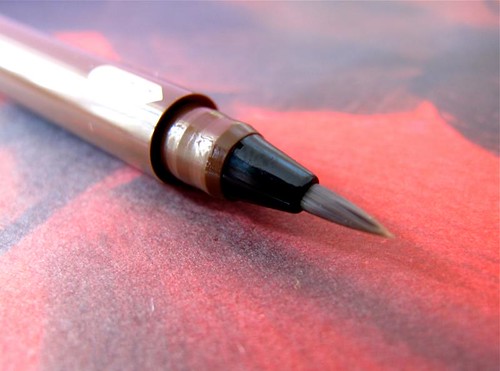
I know I've sung praises of several eyebrow products before, but I think that the K-Palette Lasting 2-Way Eyebrow Pen (P1,050 at Beauty Bar) deserves a whole new symphony. It's a fantastic eyebrow shader because it can draw realistic-looking hair using the liquid pen and give depth to brows with the powdered sponge tip.
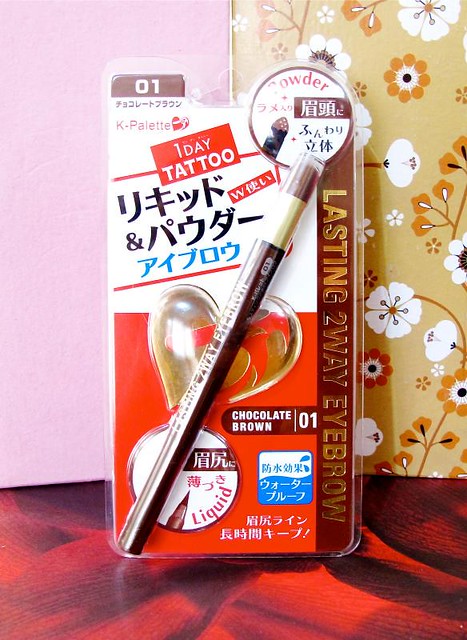
This is THE product to use if you have big gaps in your eyebrows that can't be properly filled with powder, wax, or pencil products. Using the liquid pen (such as what you would find in an eyeliner), you can easily draw short hairs on the gaps - with no one the wiser!
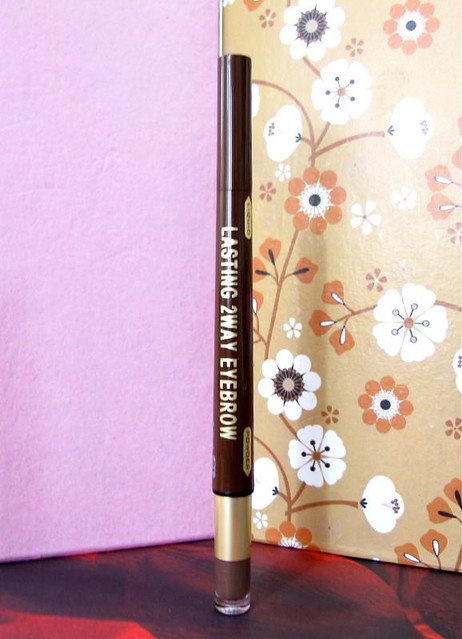
Anyway, here's a quick review and tutorial on how to use this K-Palette eyebrow pen!
What I love about the product
- You can draw perfect eyebrows with a lot more control compared to pencils, waxes, and liquid brow mascaras.
- As with all K-Palette pens, this pretty much stays put until you take it off.
- The pen end is always ready to use - no need to shake. I've had this for over a month now and it's never dry.
How to apply mascara
It's funny, but the first couple of years that I started wearing makeup, I rarely put mascara on. I thought it was an uneccessary part of my routine; why bother working on my lashes when an eyeliner could already give the illusion of a thick fringe? But I was wrong. Mascaras ARE important if you want your eyes to look more fresh and awake. There really is a difference!

Benefit They're Real Mascara
I used to just swipe my mascara upwards a couple of times and called it a day. I mean, how complicated should it be? Put goop, exeunt. However, I've learned a few tricks along the way to maximize any mascara! It doesn't matter if you're using something cheapo or expensive. Use it the right way and you can get fab lashes each time.
Here goes!

Step 1: Curl. Curl your lashes, starting at the base then crimping it upwards, tilting the curler as you go. It's important to curl your lashes before mascara to get them to stay that way all day.
How to apply flawless face makeup
Oh, if we all woke up with perfect skin then the beauty industry would be out of business. We'd be cleansing our faces with only water, wearing only sunlight and a smile when we go out. But that's not meant to be, at least for me. I have several blemishes that need to be covered up while they're fading to oblivion.
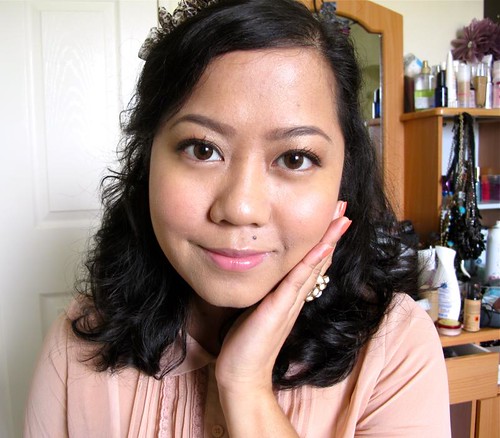
Blemishes? What blemishes, you ask? Well, you can't see them because I am somewhat of a camouflage expert. Teehee. Modesty aside I know quite a few tricks about faking flawless skin so today I'm going to share them with you! You'll find them useful if you have rough and uneven skin that may have acne/blemishes. Also, if you need heavy and long-lasting coverage.
If you already have good skin, go on your way and put my envy in your pocket!
What type of foundation should you use for maximum coverage and comfort?
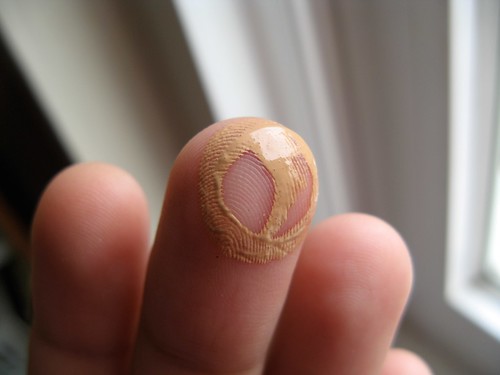
Invest in a good liquid foundation that matches your skin and your skin type perfectly. Not BB cream, powder, or cream foundation. Liquid foundation. Out of all the foundation types I've tried, liquid has the best, more natural looking coverage that has a version for all skin types (dry to oily).
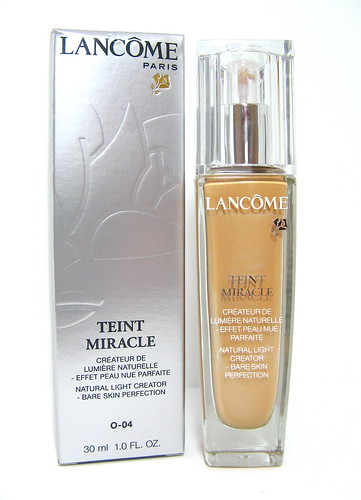
Read my top six foundation picks to see recommendations!
How to apply the foundation
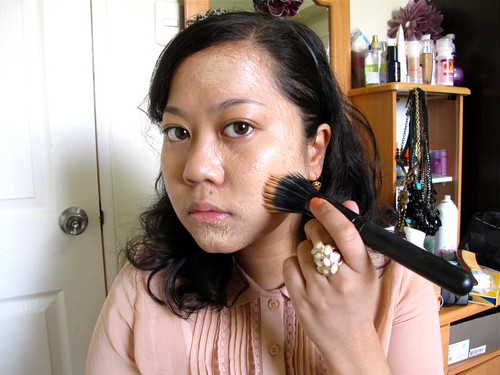
With a stippling brush (I'm using the one from Charm), dot or pat the foundation on the outer sides of your face moving inwards. You can swipe the brush to blend it better. Apply a heavy layer (as needed) on the outer area of your face, not on the T-zone as most people would recommend. Why? Because the fringes of our face like the sides of the cheeks and chin tend to break out/ blemish more.
How to walk (and last) in high heels
It's so fun when people leave interesting questions! It gets my brain working and compels me to do some research. In my legs post, one reader asked me about high heels. She said:
Hi, I've been always meaning to buy heeled shoes but I've never really gotten to wearing them...I just can't last wearing heeled shoes for prolonged periods of time (prolonged period = 1 hour or more). Is there a tip you can give on how to last in heels? Or am i just wearing the wrong kind of shoe? Are there heels that are actually comfortable? Thanks!
Walking and enduring high heels is like writing or learning how to bike - once you get the hang of it, you can't unlearn it. It just becomes an automatic skill! It's only difficult in the beginning but trust me, once you're past the initial barrier of pain and suffering, you will find your balance and a level of comfort.

Why wear heels anyway? Heels can instantly make your legs look longer, your butt perkier, and your back straighter. You will also be forced to take smaller, slower steps, so you look more graceful and poised.
My day to night look using the Etude House Dear My Blooming Lips Talk Lipsticks
Scenario: It's a busy weekend and you're out with your friends during the day, maybe for coffee and a bit of shopping. Afterwards you plan to go to a romantic dinner with your special someone (kilig!). However, you don't want to fuss around with changing your makeup since you're in a hurry! What do you do? Simple! Wear a different lipstick and add lots of smudged eyeliner!

I'm going to show you a step-by-step tutorial on how I did these looks, but first I want to share my thoughts on the new Etude House Dear My Blooming Lips Talk Lipsticks (which I'm using here). They're pretty good and costs only P478 locally! The colors are vibrant and opaque, with a smoothing and moisturizing effect on the lips.
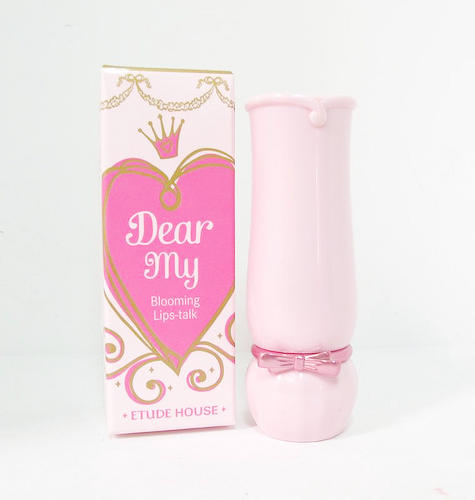
They come in several in-demand shades like Breathless Pink (hot pink), Love Pink (baby pink), Worrisome Beige (nude), Excited Orange, Thrilling Red, and Bashful Coral. The packaging is a cute princess pink color with a metallic ribbon accent.
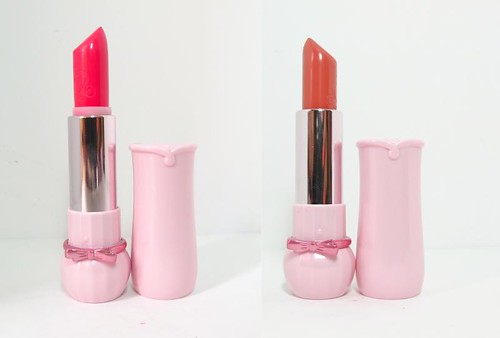
Pretty, yes? So! Here are two looks using these Etude House lippies, and a guide on how I did them. They're super simple and fun, promise.
Shu Uemura Yume Advanced Makeup Class
I taught myself everything I know about makeup. That may not sound as impressive as going to makeup school, but my skills are not too shabby, I think. :P What with all the YouTube tutorials and beauty blogs out there, there's no excuse not to master at least the basics of makeup application!

Nonetheless, it pays to learn from the professionals. They have lots of insights to share, and of course joining a personal, on-hand class is a richer learning experience! That's why I decided to take the Shu Uemura Yume Advanced Makeup Class. I know for a fact that Shu has some of the best accredited makeup artists out there, who've done countless magazines, ads, and celebrity clients here in the country.
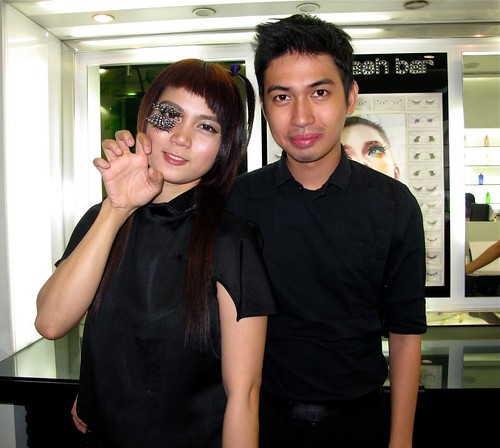
True enough, John Pagaduan taught the class that day. John is a well-known makeup artist here. I frst met him four years ago, when he did my face for an event. He was very kind and humble back then, filled with raw talent, and until this day he's very much the same artistic guy. I was very happy to get him as my instructor!
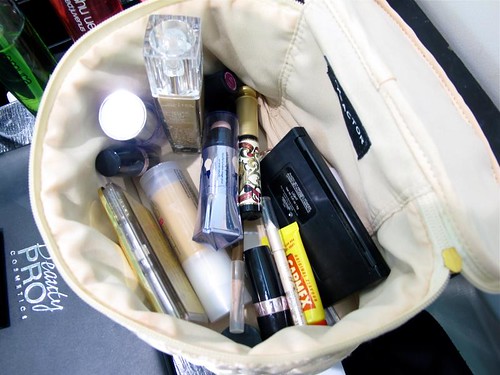
I brought all my favorite makeup, of course. Those Beauty Pro Cosmetic Palettes are perfect for trying out looks, since they have all the colors I can possibly need.
Okay, let's start! I'll show you my looks and some tips on how I did them. :D
How to clean up messy nail polish
We can't all be gods, professional nail artists, or innately ambidextrous when it comes to applying nail polish. I for one have been painting my nails for years now and I still make a mess, depending on my lack of practice! Nonetheless, people always wonder how I paint my nails so neatly. It's simple: I just clean up the mess with an eyeliner brush.
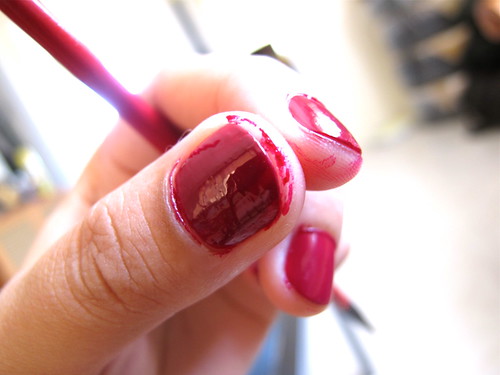
From messy...

To OC!
Yes, a brush! I saw the technique being used in Dashing Diva. The nail attendant used a straight, short-bristled brush to remove excess polish quickly and efficiently. The brush is kinda hard to find, so I used a disposable lip brush and then an old eyeliner brush to see what works best. I now go with the latter since it's bigger, angled, and thus cleans up faster in a more precise manner.

You can do this yourself as easily as I can. All you need are a few basic materials!
Tips on how to do your office makeup
Makeup for the office need not be overly complicated or fancy. It only needs to do these things for you: to make you look professional and polished, to mirror your competence and the effort you pour in your job. Now it depends on the office environment, but as a rule, a bare face can make you look lazy and ungroomed. A bit of makeup to liven up your complexion can do wonders to get you and your work noticed!
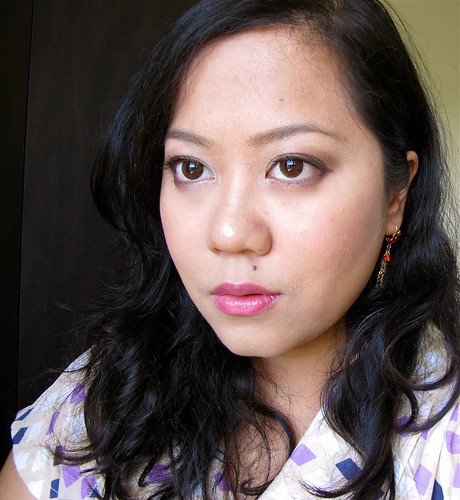
That's not to say that you should go all out and pile on the products. It's best to keep eyes subtle and soft, with just a hint of healthy glow on your cheeks. As for the lips, you can't go wrong with brown-based colors mixed with plum or pink - they are always flattering but never overbearing.
Here's a list of dos and don'ts when wearing office makeup!
- Keep your skin well-hydrated to make sure that it won't dry out with unusually cold office airconditioning. To moisturize during the day without removing your makeup, spritz on a face mist! The humectants in your moisturizer and makeup will trap the moisture of the water in your skin.
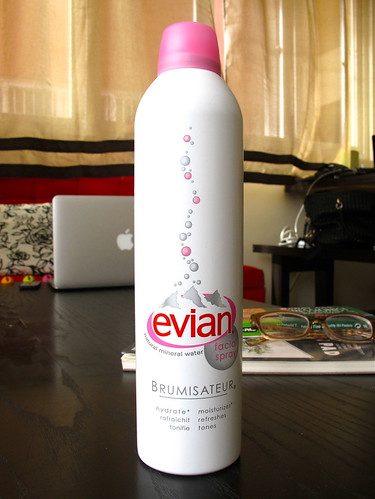
Evian is a nice facial spray. It's mineral water and has a minimum amount of chemicals.
- Invest in good makeup that are fool-proof and will get you out of the door in under 15 minutes. That means getting multi-purpose products like cheek and lip tints, BB creams, eyeliners that can double as cream eyeshadows - the likes. But of course it ultimately depends on your preferences.
